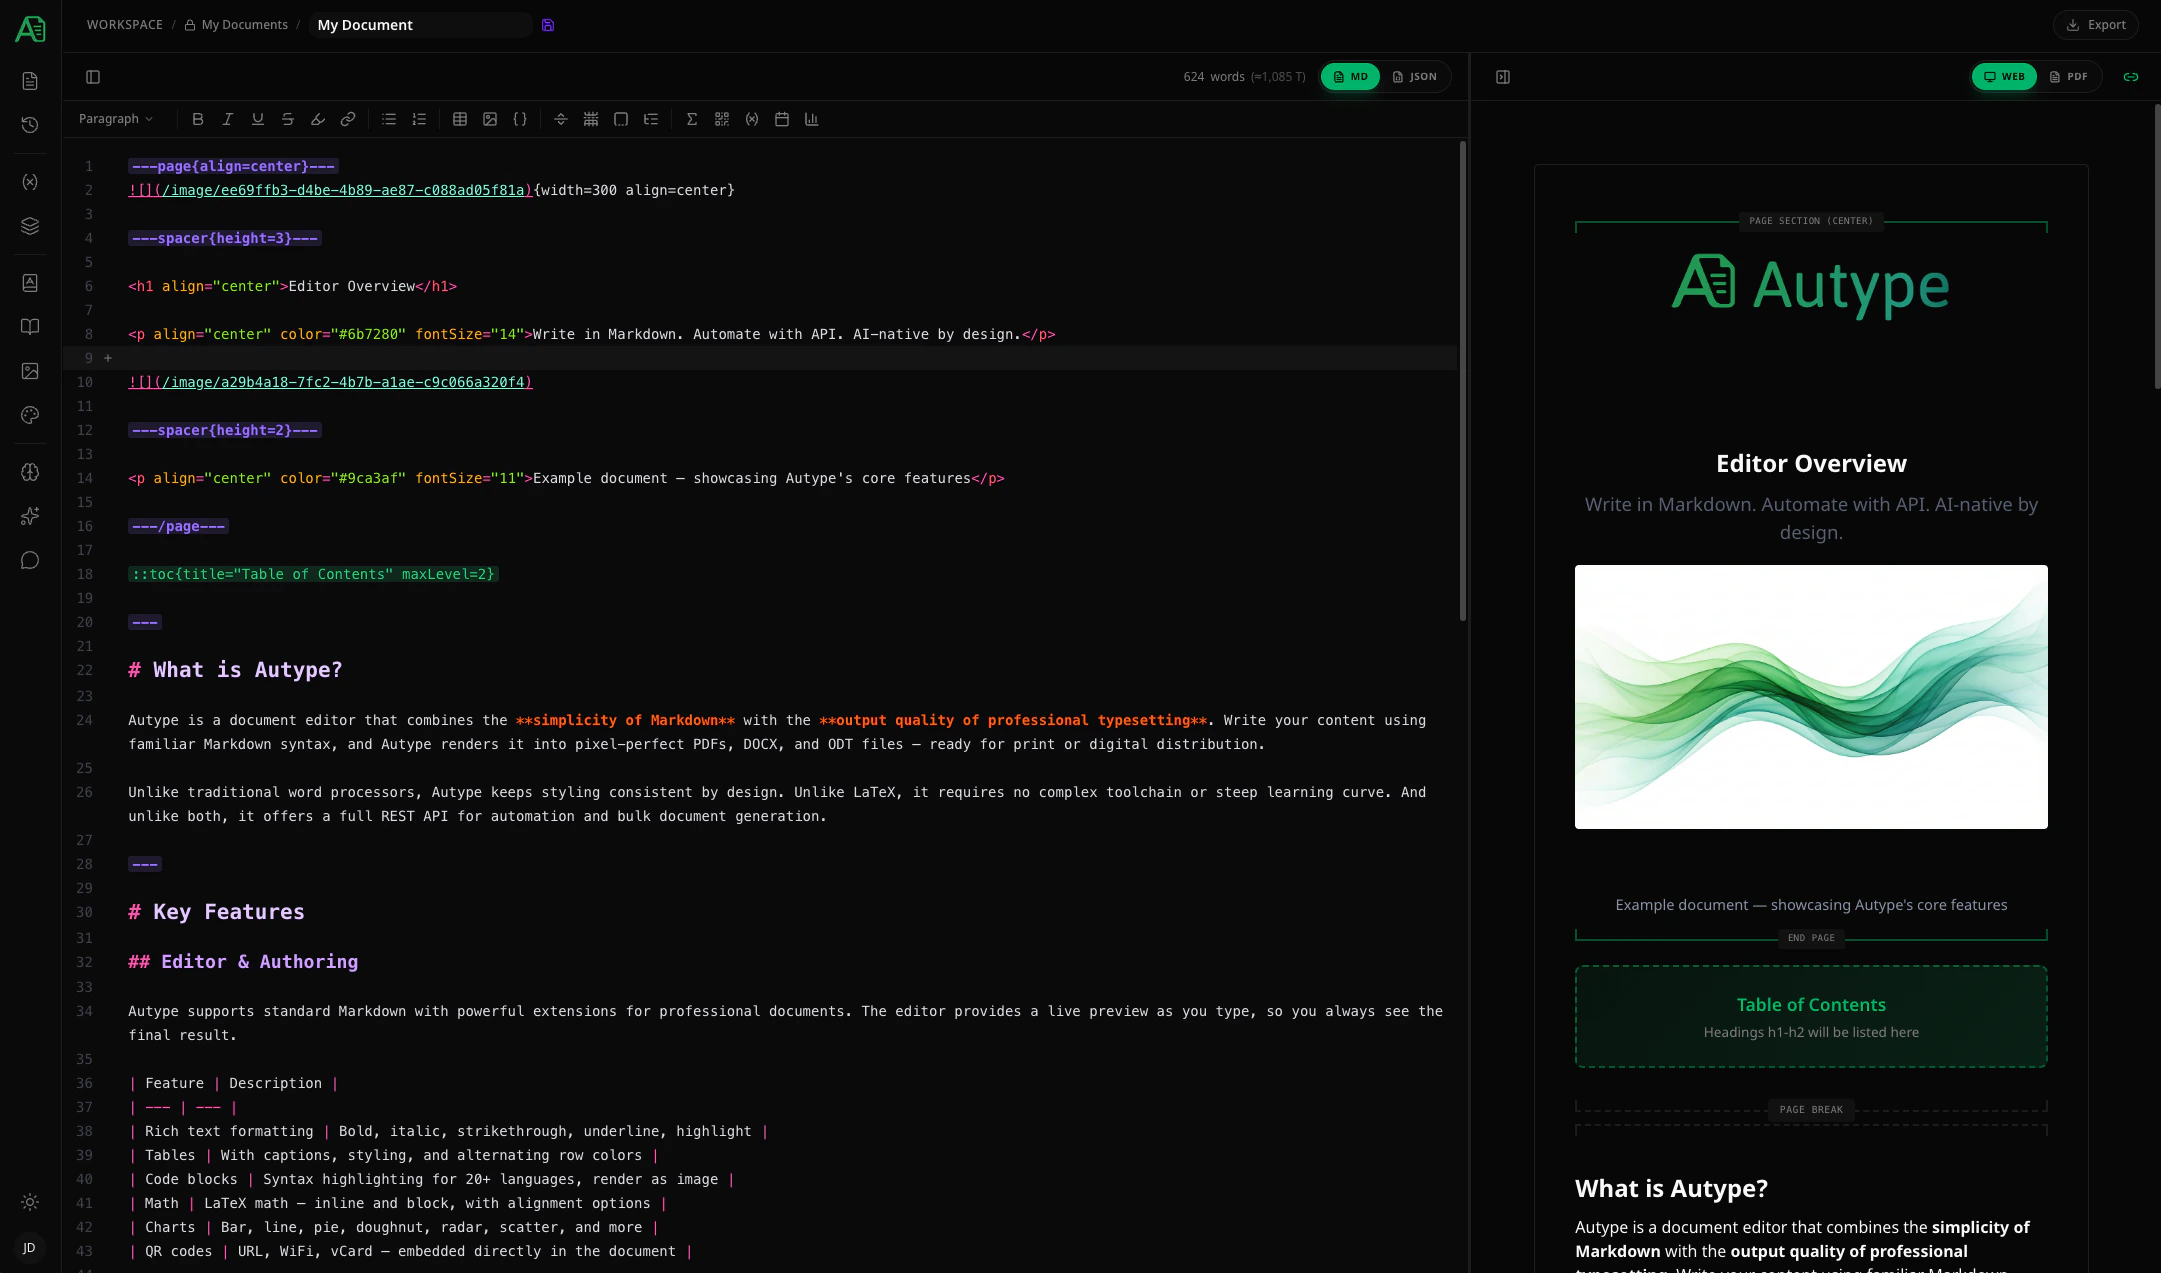
The Autype document editor — write Markdown, preview in real time, and use the sidebar panels for variables, styles, citations, and more.
The editor is where you write and design your documents. It combines a Markdown code editor on the left with a live preview on the right, plus a sidebar with panels for managing document elements.
To apply formatting, select the text you want to format first, then click the corresponding button. To remove formatting, select the formatted text (including the Markdown syntax characters) and click the button again.
The preview pane supports two rendering modes, toggled via the preview header. Which mode you prefer to work with is largely a matter of personal preference — both show your document content, just in different ways.
Shows the fully rendered document exactly as it will look when exported — including page layout, margins, headers, footers, and page breaks
Best for fine-tuning layout and verifying the final appearance of your document
A new render is triggered after saving (either via the auto-save interval or a manual save)
A refresh indicator shows when a new render is in progress
Rendering time depends on document size and current server load — it can take up to 1 minute for large documents. Documents with many images will take longer to render.
Your document is continuously synchronized with the server in real time. Every change you make is sent to the server immediately, ensuring that an up-to-date version is always persisted.You can trigger a manual save by pressing ⌘S (Mac) or Ctrl+S (Windows/Linux), or by clicking the save icon next to the document name in the top bar.
The save icon next to the document name indicates the current sync status:
Icon
State
Description
Synced
All changes have been saved successfully
Auto-save active
Auto-save is enabled — changes will be saved automatically at the next interval
In addition to continuous sync, snapshots are automatically created at regular intervals. These snapshots can be accessed through the Version History panel to review or restore previous states of your document.
On unstable network connections, synchronization may be interrupted temporarily. Changes made offline will be synced once the connection is restored. If you’ve had the editor open for a long time without activity and experience issues, a simple page reload will re-establish the connection and resolve most problems.
The editor highlights syntax errors and warnings directly in the code. Clicking on an error or warning navigates you directly to the line where the problem occurs. Hover over an underlined section to see the error message in a tooltip.
Red underlines indicate syntax errors — for example, invalid attribute values or unclosed directives. Documents with errors cannot create a new version and will not trigger a new PDF render or any other export format.
Yellow underlines indicate warnings — for example, missing citation references or undefined abbreviations. Documents with warnings can still be saved and rendered normally, but you should review them to ensure the output is as expected.
When multiple users have the same document open, their avatars appear in the top bar so you can see who is currently active.
Inside the editor, each collaborator has a colored cursor and their text selections are visible to everyone. Hover over a cursor to see who is typing. All changes from other users appear in real time.
Click the download button in the top bar to export your document:
Format
Description
PDF
Portable Document Format — most common for sharing
DOCX
Microsoft Word format — editable in Word, Google Docs
ODT
Open Document Format — editable in LibreOffice
The exported document will look virtually identical to the PDF preview (~99% match). Minimal differences may occur if a font is rendered slightly differently between the preview and the export engine.
At the bottom of the sidebar, a JSON view toggle lets you switch from Markdown editing to the raw JSON document schema. The JSON represents the complete document structure — it can be used directly with the Developer API and contains everything except uploaded media files.
In the top-right corner of the JSON editor, you’ll find a “Read-only” button. By default, the JSON view is read-only for safe inspection. Clicking this button enables editing mode, allowing you to modify the JSON directly.
Only edit the JSON if you have a solid understanding of JSON and the document schema format. Invalid changes can break your document. JSON editing is not available during live collaboration sessions to prevent inconsistent document states between collaborators.